目次
はじめに
作成するツールのイメージ
GmailAPIを使用するための準備
Google認証から下書き作成まで
次回
はじめに
メールで添付ファイルを送る際に添付ファイルをパスワード付きで圧縮し、添付ファイルを付けたメールと別に解凍パスワードを本文に入れたメールを送るのが、まだ一般的かと思います。
私は業務で添付ファイルを付けたメールを送ることが多くわずらわしさを日々感じています。
今回この一連の作業を自動化するツールをPythonを使用して2回に分けて作成したいと思います。
作成するツールのイメージ
添付したいファイルを所定のフォルダに格納しスクリプトを実行すると、Gmailに下書きが2件作成されます。
1つ目の下書きはフォルダに格納されていたファイルがパスワード付きで圧縮され添付されているメール。
2つ目の下書きは圧縮する際に使用したパスワードが本文に記載されているメール。
GmailAPIを使用するための準備
下書きを作成したいGmailアカウントでGoogleにログインし、以下のURLにアクセスしGoogle Cloud Platformコンソールを開きます。
https://console.cloud.google.com/
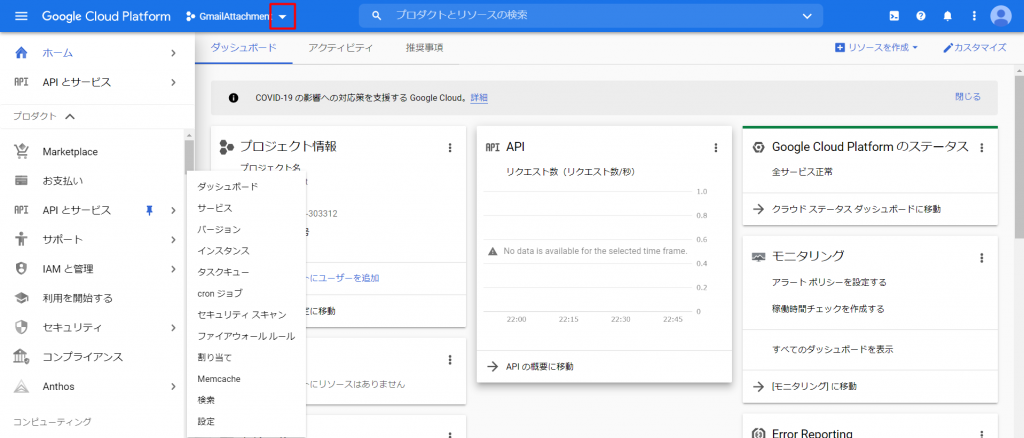
GamilAPIを使用するためのプロジェクトを作成
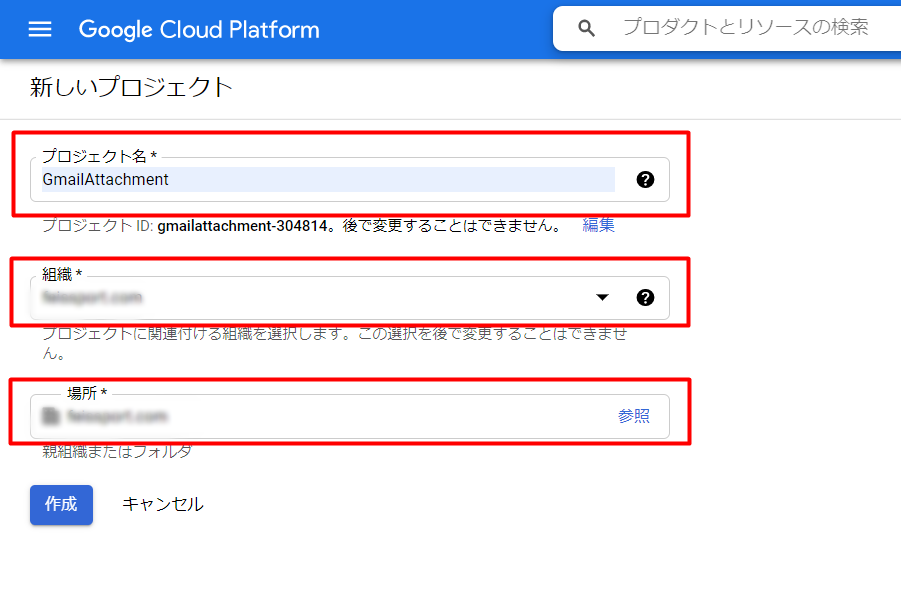
1、下記画像の「▽」をクリックします。
2、「新しいプロジェクト」をクリックします。
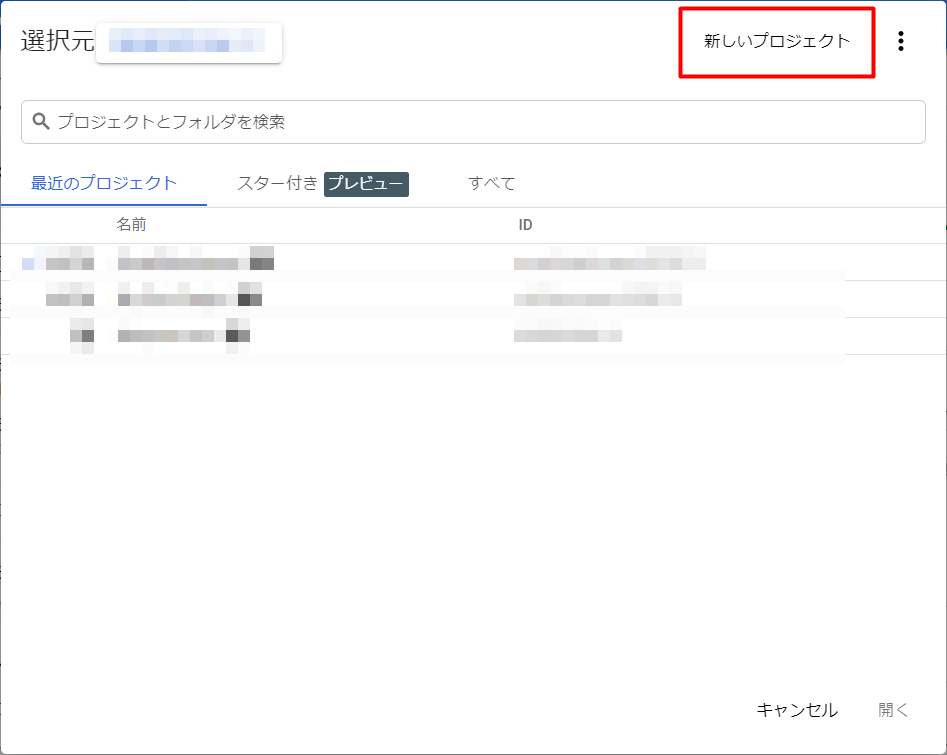
3、プロジェクト名、組織、場所を入力します。
今回「GmailAttachment」というプロジェクトを作成しました。
GmailAPIの有効化
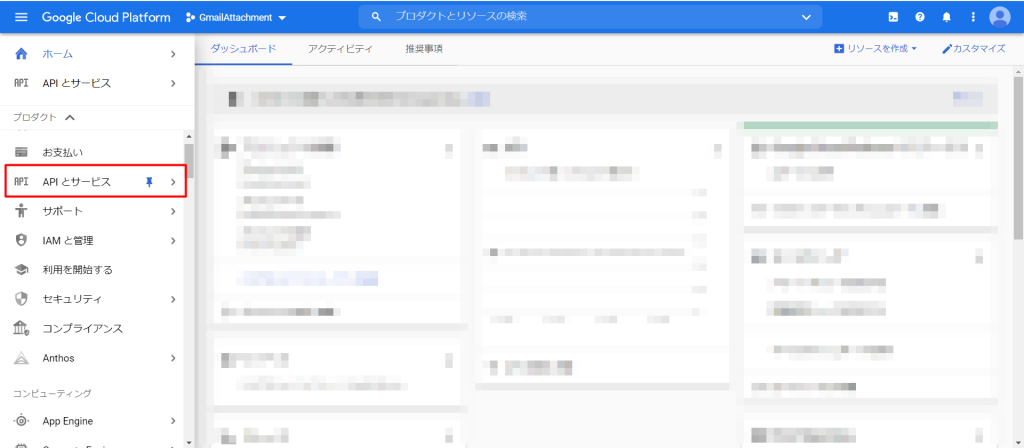
1、「APIとサービス」をクリックします。
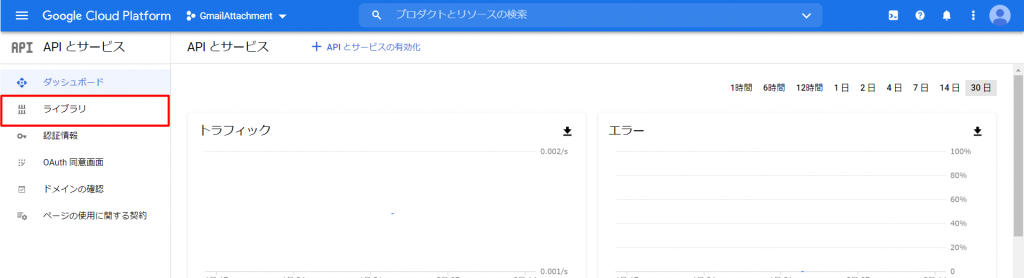
2、「ライブラリ」をクリックします。
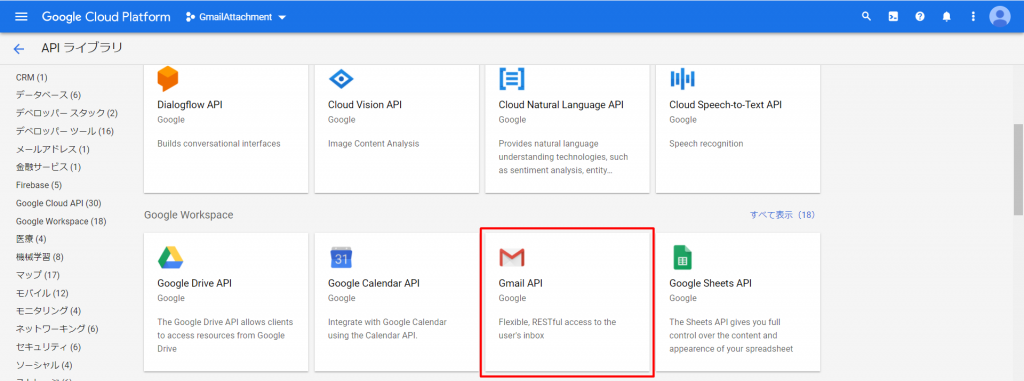
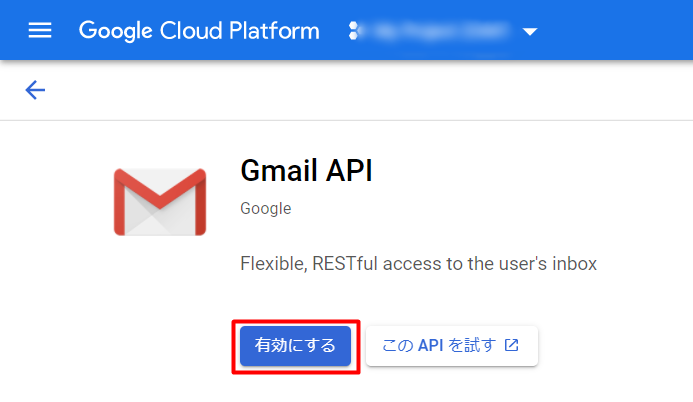
3、「GmailAPI」をクリックします。
4、「有効にする」をクリックします。
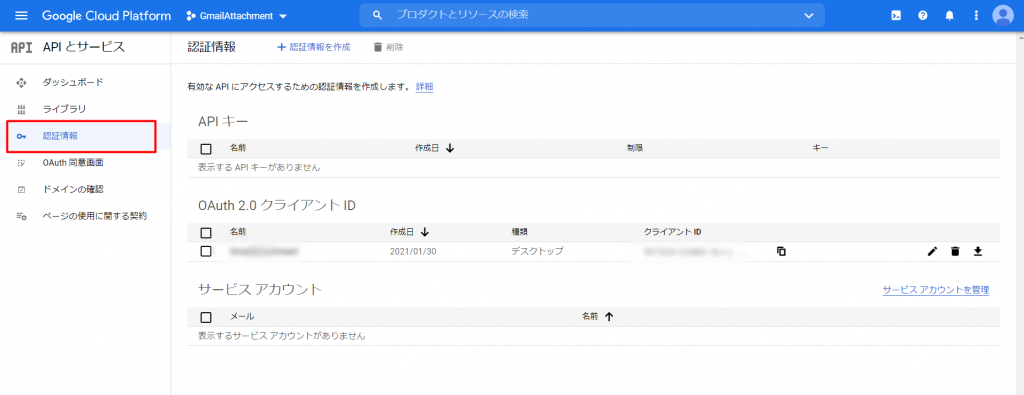
5、「認証情報」をクリックします。
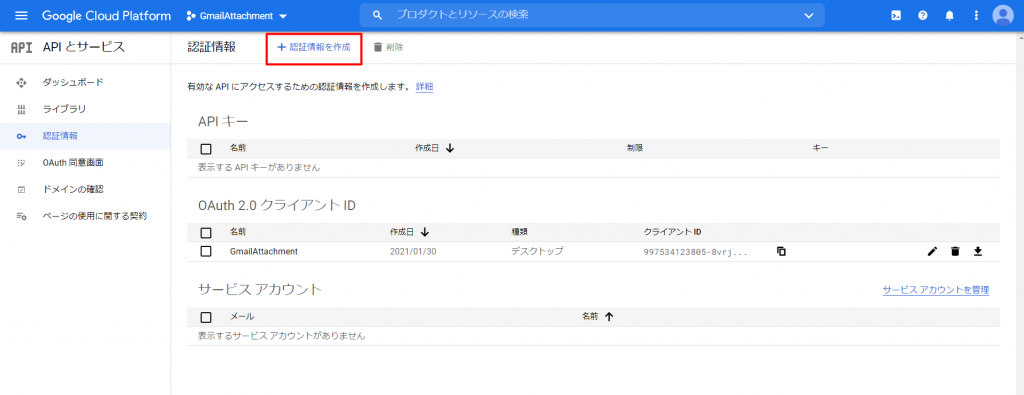
6、「認証情報を作成」をクリックします。
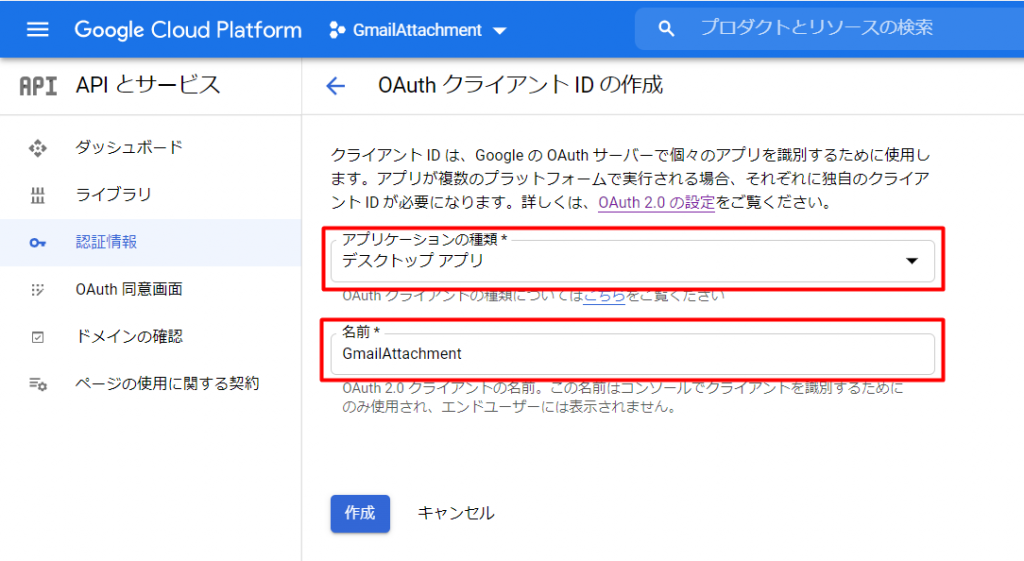
7、アプリケーションの種類と名前を入力します。今回は下記で入力しています。
アプリケーションの種類:デスクトップアプリ
名前:GmailAttachment
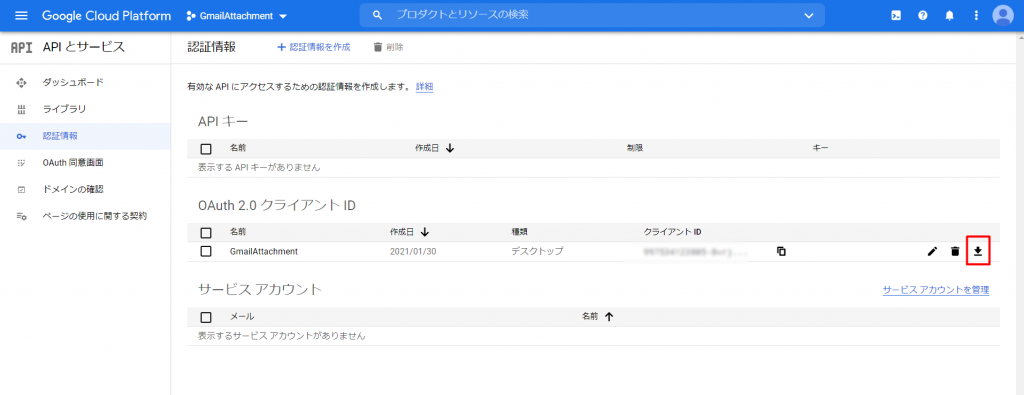
8、作成した認証キーをダウンロードします。
次の章の「Google認証」にて使用します。
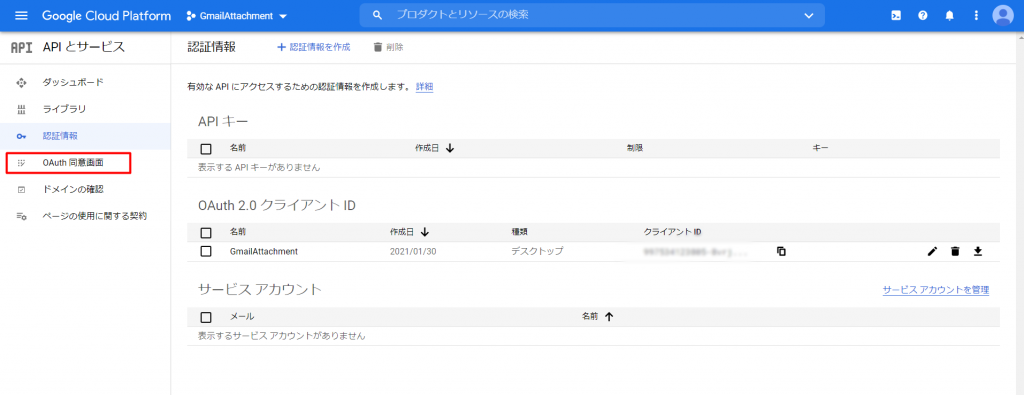
9、「OAuth同意画面」をクリックします。
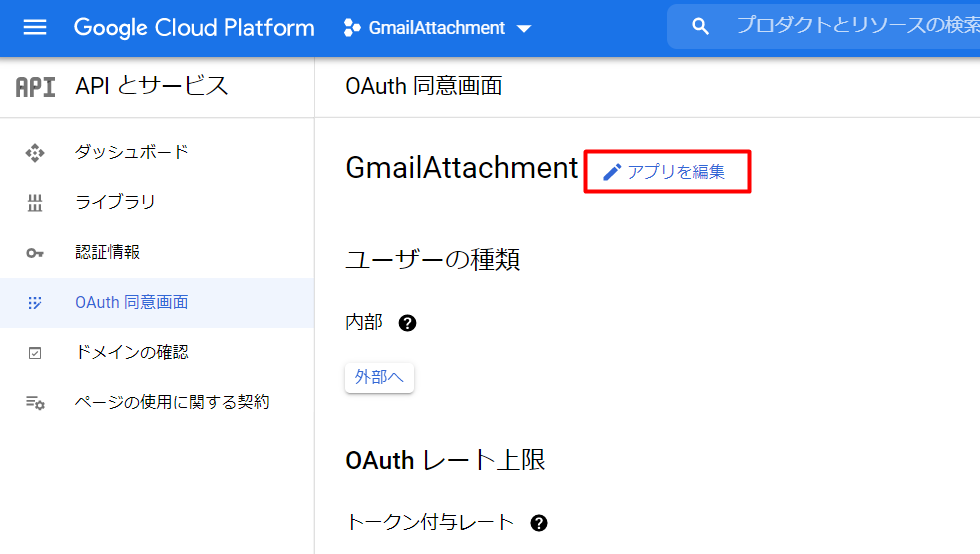
10、「アプリを編集」をクリックします。
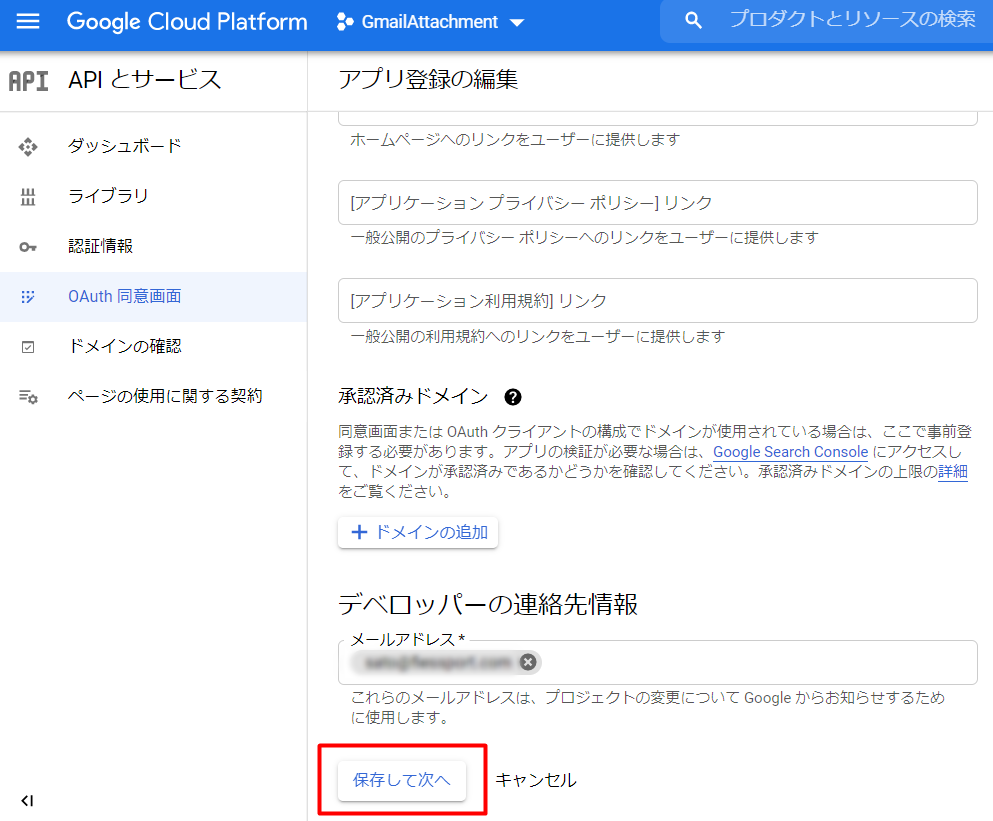
11、 「保存して次へ」をクリックします。
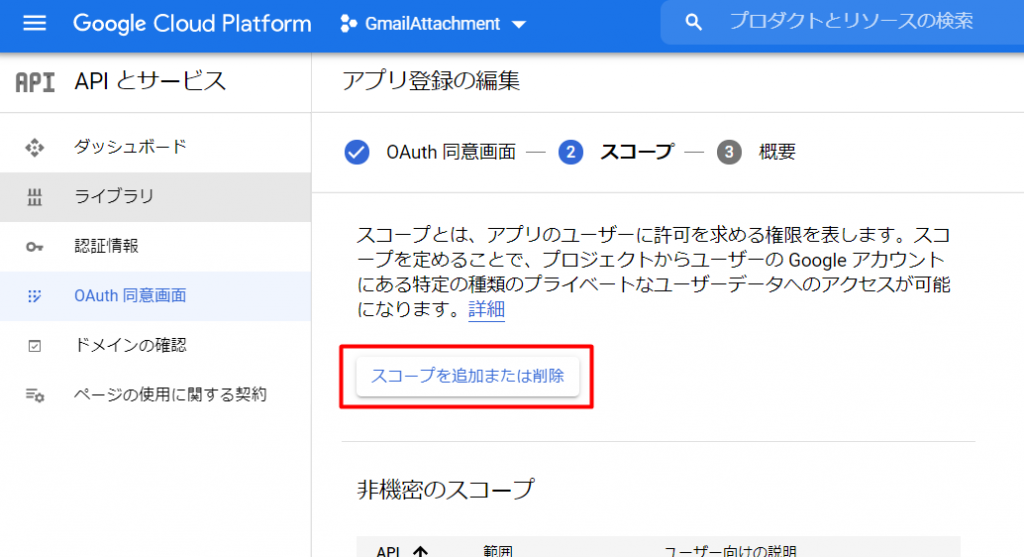
12、「スコープを追加または削除」をクリックします。
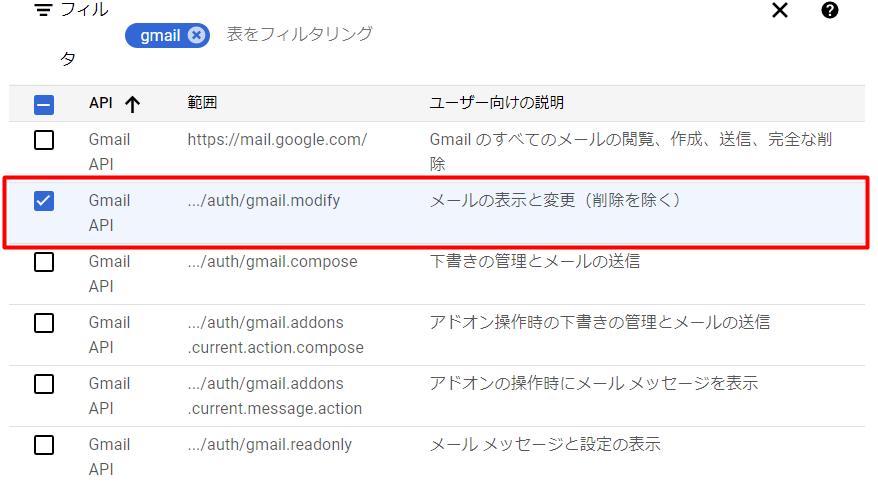
13、使用するスコープを選択します。
下書き作成の場合以下の4つの内どれかを指定することで下書き作成用のAPIを使用できるようになります。
・https://mail.google.com/
・https://www.googleapis.com/auth/gmail.modify
・https://www.googleapis.com/auth/gmail.compose
・https://www.googleapis.com/auth/gmail.addons.current.action.compose
こちらの内容はGoogleのリファレンスに記載されています。
https://developers.google.com/gmail/api/reference/rest/v1/users.drafts/create
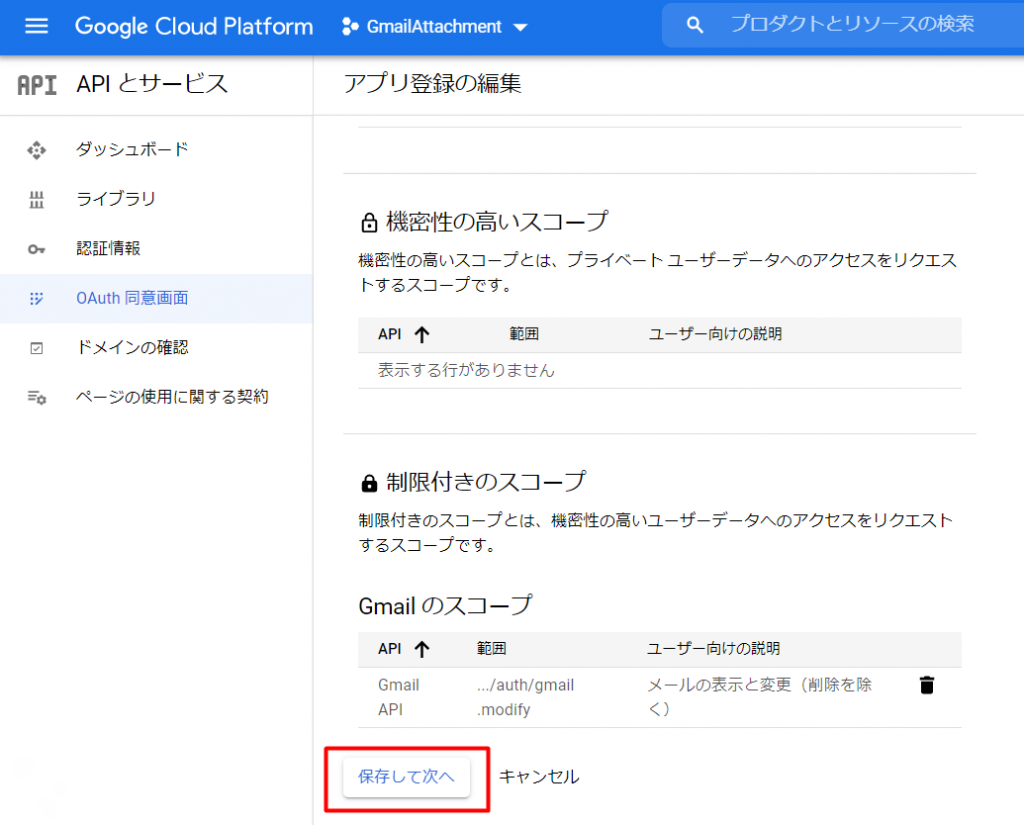
14、「更新」をクリックします。

15、「保存して次へ」をクリックします。
Google認証から下書き作成まで
ここからはPythonでコードを書いていきます。
インストールをしていない場合には下記URLからインストーラをダウンロードしインストールしてください。
私がインストールしているバージョンは「3.9.0」で使用しているエディタはVisual Studio Codeになります。
https://www.python.org/downloads/
1、任意の場所にフォルダを作成し、Visual studio Codeでそのフォルダを開きます。
2、仮想環境を作成します。
Visual Studio Codeのターミナルを開き以下のコードを入力します。
python -m venv venv
3、先ほど作成した仮想環境を有効化します。
.\venv\Scripts\activate
4、GmailAPIを使用するためのライブラリをインストールします。
Visual Studio Codeのターミナルに以下のコードを入力します。
pip install --upgrade google-api-python-client google-auth-httplib2 google-auth-oauthlib
5、ファイルを作成し、以下のコードを記載します。
今回ファイル名は「quickstart.py」としています。
また、コードは下記のリファレンスを参考にしています。
認証部分:https://developers.google.com/drive/api/v3/quickstart/python
下書き作成:https://developers.google.com/gmail/api/guides/drafts
from __future__ import print_function
import pickle
import os.path
from googleapiclient.discovery import build
from google_auth_oauthlib.flow import InstalledAppFlow
from google.auth.transport.requests import Request
# クイックスタートに足りない項目のimport
import base64
from email.mime.text import MIMEText
from apiclient import errors

# Gmail APIのスコープを設定
SCOPES = ['https://www.googleapis.com/auth/gmail.modify']

# Gmailの下書き作成
def create_draft(service, user_id, message_body):
  try:
    message = {'message': message_body}
    draft = service.users().drafts().create(userId=user_id, body=message).execute()

    print ('Draft id: %s\nDraft message: %s' % (draft['id'], draft['message']))

    return draft
  except errors.HttpError as error:
    print ('エラー: %s' % error)
    return None

# 下書きメール本文の作成
def create_message(subject, message_text):
    message = MIMEText(message_text)
    message['subject'] = subject
    encode_message = base64.urlsafe_b64encode(message.as_bytes())
    return {'raw': encode_message.decode()}

# メインの処理
def main():
    # Google認証の処理
    creds = None
    if os.path.exists('token.pickle'):
        with open('token.pickle', 'rb') as token:
            creds = pickle.load(token)
    if not creds or not creds.valid:
        if creds and creds.expired and creds.refresh_token:
            creds.refresh(Request())
        else:
            flow = InstalledAppFlow.from_client_secrets_file(
                'credentials.json', SCOPES)
            creds = flow.run_local_server()
        with open('token.pickle', 'wb') as token:
            pickle.dump(creds, token)

    # GmailAPIを実行するオブジェクト作成
    service = build('gmail', 'v1', credentials=creds)

    # 下書き本文の作成
    subject = '下書き作成テスト'
    message_text = '下書きを作成する為のテストです。'
    message = create_message(subject, message_text)

    # 下書き作成
    create_draft(service, 'me', message)

if __name__ == '__main__':
    main()
6、先ほど「GmailAPIの有効化」の手順8でダウンロードしたキーを下記名称に変更し、スクリプトと同階層のフォルダに格納します。
ファイル名称:credentials.json
7、作成したスクリプトを実行します。
※8~10の作業は初回実行時、もしくはスクリプトの同階層にプログラムが作成する「token.pickle」が削除されている状態で実行した際、認証トークンの有効期限が切れている際に
token.pickleには認証トークンが記載されています。
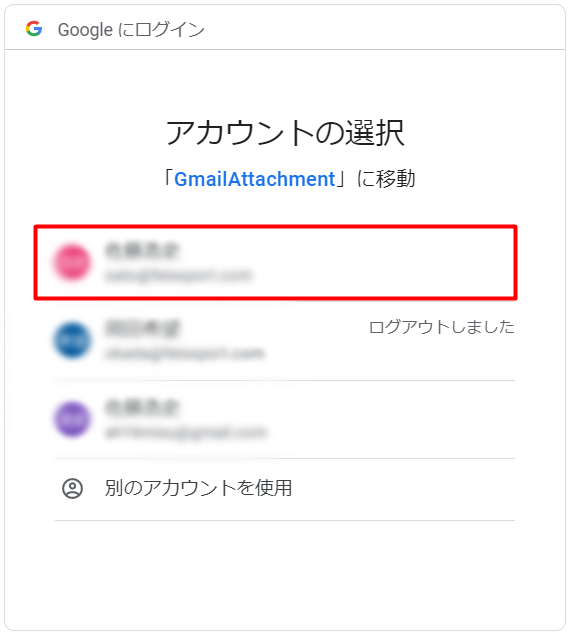
8、使用するアカウントを指定します。
9、「許可」をクリックします。

10、以下のメッセージがブラウザに表示されます。

11、Gmailを開いて下書きが作成されていました。

次回
今回はGmailの下書き作成まで実施しました。
その中でGCPの設定や、GoogleのAPIの使用方法、Googleの認証方法を学ぶことが出来ました。
次回で添付ファイルのパスワード付きで圧縮し添付ファイル付きの下書きとパスワードが記載された下書き作成をして終了となりますが、今回学んだことを生かしてほかのAPIを使用した記事等も書くことが出来たらと思っています。