
目次
今回の目標
[小ネタ]項目名の表示
項目追加機能
カレンダーの追加
リセット機能
次回予告
今回の目標
前回は、日報アプリをReactで実装し、項目の変更や削除ができるようになりました。
今回は、第3回に引き続き項目の追加など機能を増やして紹介したいと思います。
前回の記事はこちら ↓

前回より機能を増やしていきます。
[小ネタ]項目名の表示
前回までの実装でお気づきの方もいらっしゃるかもしれません。
「どこに何を入力すればいいのか」と。そう、項目名がなかったですよね。
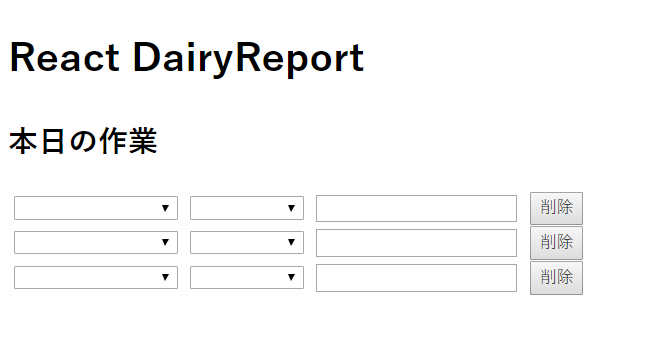
今回は未入力の場合に、項目欄に薄く表示する形にしたいと思います。
render() {
//プロジェクト名のドロップダウンリスト用
var projects = this.props.projects.map((elem, i) => {
return
});
//タスクのドロップダウンリスト用
var tasks = this.props.tasks.map((elem, i) => {
return
});
var item = this.props.rows.map((elem, i) => {
return (
)
});
return (
{item}
);
}
src/components/inputTask.js
テキストボックスには、placeholder属性を追加するだけで簡単に実装できます(34行目)。
セレクトボックスの最初の一行目に表示するには少し工夫が必要で、上記のように記載する必要があります(27,31行目)。
またセレクトボックスに上記を追加することで、プレースホルダー用の項目が追加されますので、初期項目の先頭の空白をなくしておきます。
// src/index.js
import React from 'react';
import ReactDOM from 'react-dom';
import './App.css';
import {DairyReport} from './components/main';
import * as serviceWorker from './serviceWorker';
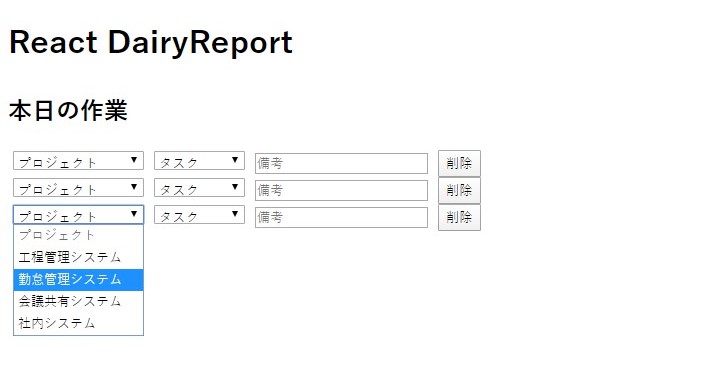
var projectList = ["", "工程管理システム", "勤怠管理システム", "会議共有システム", "社内システム"];
var taskList = ["", "仕様書作成", "製造", "テスト", "打ち合わせ"];
var rowList = [{index:1},{index:2},{index:3}];
var projectList = ["工程管理システム", "勤怠管理システム", "会議共有システム", "社内システム"];
var taskList = ["仕様書作成", "製造", "テスト", "打ち合わせ"];
src/index.js
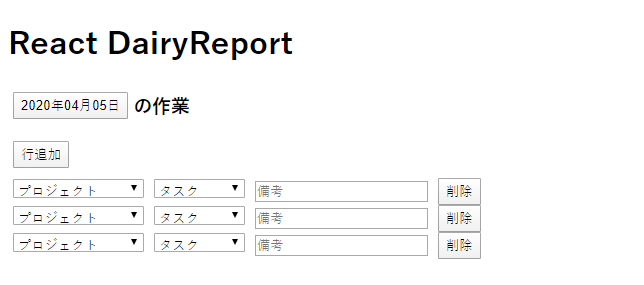
表示が以下のようになります。
inputTask.jsでセレクトボックスのoptionにdisabled属性を指定することで、一度項目を選択すると、”プロジェクト”や”タスク”は選択できなくなります。
項目追加機能
次は項目行の追加機能を実装していきます。
// src/components/main.js
import React from 'react';
import {Task} from './inputTask';
export class DairyReport extends React.Component {
constructor(props) {
super();
this.state = {rows: props.rows};
this.addTask = this.addTask.bind(this);
this.removeTask = this.removeTask.bind(this);
}
addTask(){
var updatedTasks = this.state.rows;
updatedTasks.push({index:""});
this.setState({rows: updatedTasks});
}
removeTask(index) {
var updatedTasks = this.state.rows;
delete updatedTasks[index];
this.setState({rows: updatedTasks});
}
justSubmitted(event) {
//ページがロードされるのを防ぐ
event.preventDefault();
}
render() {
return (
React DairyReport
本日の作業
);
}
}
src/components/main.js
main.jsへの追加は第3回の削除機能の追加と同じような感じになります。
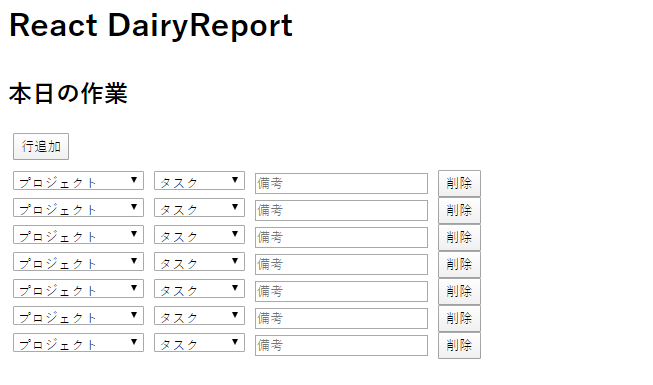
34行目で行追加ボタンを追加し、onClickイベントを設定しています。
addTaskメソッドを追加しており、行の最後に1行追加する処理後、追加された状態が新たな作業内容のstateとしてセットされるようになります。
また追加ボタンのマージンが気になったので、クラスを追加して少し調整しています。
/* 要素間のマージン調整 */
select,
button,
.adjust_margin {
  margin-right: 5px;
  margin-left: 5px;
}
.addButton_margin {
  margin-bottom: 10px;
}
src/App.css
カレンダーの追加
「本日の作業」の部分を本日の日付が表示されるよう変更します。
折角なので、カレンダーで日付を選択できるようにもしたいと思います。
今回はReactでDatepickerを実装できるライブラリ「react-datepicker」を使ってみます。
まずはライブラリをインストールしましょう。ターミナルで以下のように入力します。
npm install react-datepicker --save
次にライブラリをインポートして使用しましょう。
Datepicker用に新しく以下のファイルを追加します。
// src/components/inputCalendar.js
import React from 'react';
import DatePicker, { registerLocale } from 'react-datepicker';
import 'react-datepicker/dist/react-datepicker.css';
import ja from "date-fns/locale/ja";
registerLocale("ja", ja);
export class Calendar extends React.Component {
constructor(){
super();
this.state = {day: new Date()};
}
render() {
const CustomInput = ({ value, onClick }) => (
);
const handleChange = (date) => {
this.setState({day: date});
}
return (
src/components/inputCalendar.js
2~4行目でDatepicker関連をインポートしています 。
4, 6, 25行目でカレンダーを日本語対応に変更しています。
また15~19行目と29行目でカレンダーをテキストボックスからボタンに変更しています。
その他、細かい設定もできるようです。詳細は以下をご覧ください。
[参考]公式ページ

// src/components/main.js
import React from 'react';
import {Task} from './inputTask';
import {Calendar} from './inputCalendar';
export class DairyReport extends React.Component {
constructor(props) {
super();
this.state = {rows: props.rows, data:props.data};
this.addTask = this.addTask.bind(this);
this.removeTask = this.removeTask.bind(this);
}
addTask(){
var updatedTasks = this.state.rows;
updatedTasks.push({index:""});
this.setState({rows: updatedTasks});
}
removeTask(index) {
var updatedTasks = this.state.rows;
delete updatedTasks[index];
this.setState({rows: updatedTasks});
}
justSubmitted(event) {
//ページがロードされるのを防ぐ
event.preventDefault();
}
render() {
return (
React DairyReport
の作業
);
}
}
src/components/main.js
カレンダーのコンポーネントをmain.jsで設定します
3行目のインポートを忘れないようにしましょう。
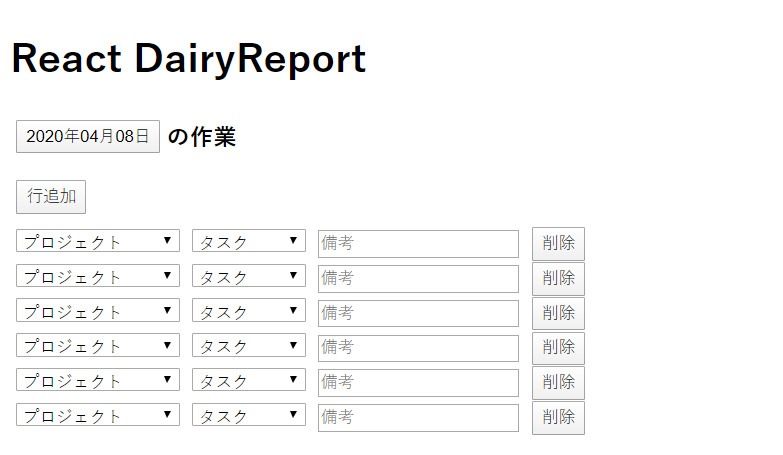
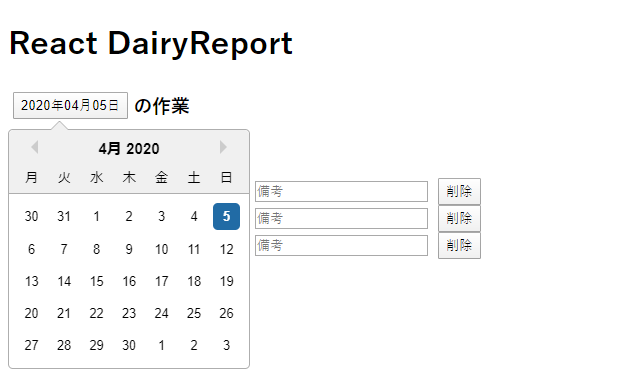
これで「本日の作業」から「yyyy年mm月dd日の作業」と表示されるようになります。
ボタンを押すことで別の日付を設定することもできるようになります。
またボタン周りのCSSを調整しています。
/* 要素間のマージン調整 */
select,
button,
.adjust_margin {
  margin-right: 5px;
  margin-left: 5px;
}
.addButton_margin {
  margin-bottom: 10px;
}
.float_left {
  float: left;
}
src/App.css
リセット機能
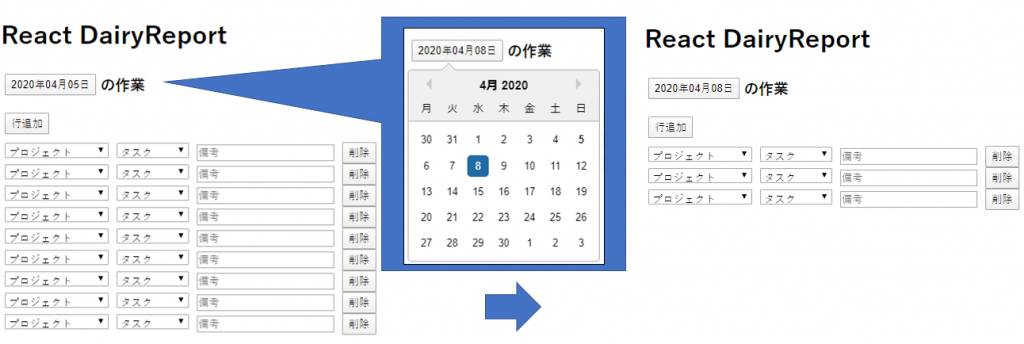
カレンダーボタンで日付が変わるようになったのはいいのですが、今のままでは日付が変更されてもリストはそのままです。
日付が変更された際に、リストが初期化されるようにしてみました。
// src/components/inputCalendar.js
import React from 'react';
import DatePicker, { registerLocale } from 'react-datepicker';
import 'react-datepicker/dist/react-datepicker.css';
import ja from "date-fns/locale/ja";
registerLocale("ja", ja);
export class Calendar extends React.Component {
constructor(){
super();
this.state = {day: new Date()};
this.reset = this.reset.bind(this);
}
reset() {
this.props.reset();
}
render() {
const CustomInput = ({ value, onClick }) => (
);
const handleChange = (date) => {
this.setState({day: date});
this.reset();
}
return (
src/components/inputCalendar.js
// src/components/main.js
import React from 'react';
import {Task} from './inputTask';
import {Calendar} from './inputCalendar';
import {Report} from './keepReport';
export class DairyReport extends React.Component {
constructor(props) {
super();
this.state = {rows: props.rows, data:props.data};
this.addTask = this.addTask.bind(this);
this.removeTask = this.removeTask.bind(this);
this.resetTask = this.resetTask.bind(this);
}
addTask(){
var updatedTasks = this.state.rows;
updatedTasks.push({index:""});
this.setState({rows: updatedTasks});
}
removeTask(index) {
var updatedTasks = this.state.rows;
delete updatedTasks[index];
this.setState({rows: updatedTasks});
}
resetTask() {
this.setState({rows:[{index:1},{index:2},{index:3}]});
}
justSubmitted(event) {
//ページがロードされるのを防ぐ
event.preventDefault();
}
render() {
return (
React DairyReport
の作業
);
}
}
src/components/main.js
カレンダーの日付が変更された際に、リストが初期化されるようになりました。
(ちょっと不格好ですが、もう少し綺麗な書き方があるかもしれません…)
次回予告
2回に渡って日報アプリをReactで実装した場合の実装を行いました。
(保存に関しては、DBの処理が入ってくるため今回は割愛させていただきます)
次回はVue.jsで実装した場合の紹介をしたいと思います。